Showing posts with label penguins. Show all posts

Friday, January 9, 2015

Clay Penguins


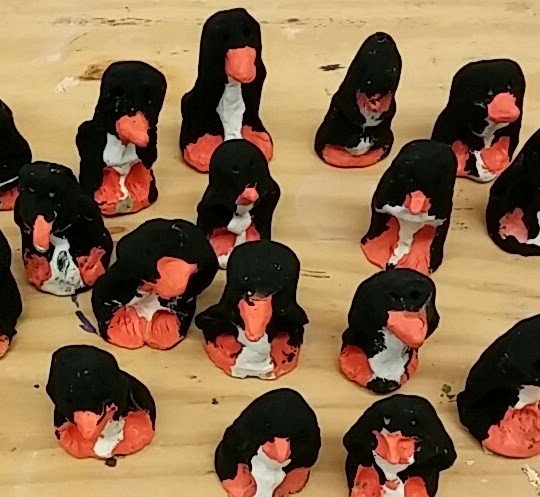
Second graders made these super cute little clay penguins.  The kids started by making a smooth sphere.  I compare it to a planet with no rivers (cracks) or mountains (bumps).  I show them how to gently tap down the mountains and cross the rivers with a finger to smooth them out. Next, the sphere is rolled into an egg shape and the bottom is flattened so that the penguin can stand!  

In second grade, the kids do clay projects that don't involve attaching pieces of clay.  Instead, we focus on pinch and pull techniques to gently form the clay.  We pinch and pull to create the beak, wings and feet. The clay we use is air-dry clay which can be purchased at craft stores like Hobby Lobby.  (The kids always ask).  It does not need to be fired in a kiln but is less durable than kiln fired clay.

Finally, after the clay air-dries, we carefully paint the little penguins with our best acrylic paint!


Goals: I can...
- Explain where clay comes from
- Create a smooth sphere
- Use push and pull techniques to form the clay sculpture


Thursday, January 2, 2014

Penguin Sculptures

Our young artists helped recycle cardboard tubes to make these cute little penguins!  We learned about sculpture in this quick but fun project before winter break!


Learning goals: I can...
- explain what sculpture is
- explain how this project is related to recycled art
- use a double cut technique to create identical shapes

Sunday, February 17, 2013

Penguins

First graders created collage penguins.  This project has a number of steps and new materials.  The penguin collage helps students with spacial skills and strategies.  Believe it or not it comes as a great surprise to young students that if they fold a paper in half and cut out a circle they end up with 2 matching circles.   This is a concept that takes a while for some younger students to understand.  Even older students forget about it if they don't use it once in a while!  Imagine their surprise when they fold it one more time and end up with four!  First graders also play some mind Twister when they learn that if you use a triangle for an arm, you can turn that tringle a variety of directions and get different arm positions!  I don't know how many times I have come across a kiddo who is frustrated because they can't get the arm to point the way they want and it turns out that they forgot they could flip it over to the back side!

Printing the snowflakes is a tricky fine motor (hand control) task.  I warn the kids that if they want to make special snowflakes they will need to be very careful!  I tell them that if they don't think they can be careful then they are allowed to use dots of paint.  All the kids usually resolve to be extra careful and try the challenge!  I discovered that presenting the challenge this way gets better results from my kiddos who love to rush.

Learning Goals: I can...
- Create a collage
- Use a double-cut to make matching shapes (fold the paper in half first and cut through both)
- Create an oval from a rectangle by cutting off corners (this method is used so that the oval stays large and so that the kids learn to differentiate between the different parts of a shape)
- Cut fabric (new materials)
- Print snowflakes